
This project is part of my internship in Switzerland and it is about Immersive Virtual Reality (IVR) in a medical environment to create a realistic tool that simulates an emergency evacuation status.
Several are the applications for educational and training purposes. For example, it is possible to train the medical staff or the fire-fighters team with the hospital built in the IVR.
Furthemore, it can be used for collecting data about visitors and patient behaviour in case of an emergency inside the building.
Chapter 1
Step 0
Getting used to Unity editor by implementing basic features inside a 3D Unity game (take a look at Lego Microgame).

Step 1
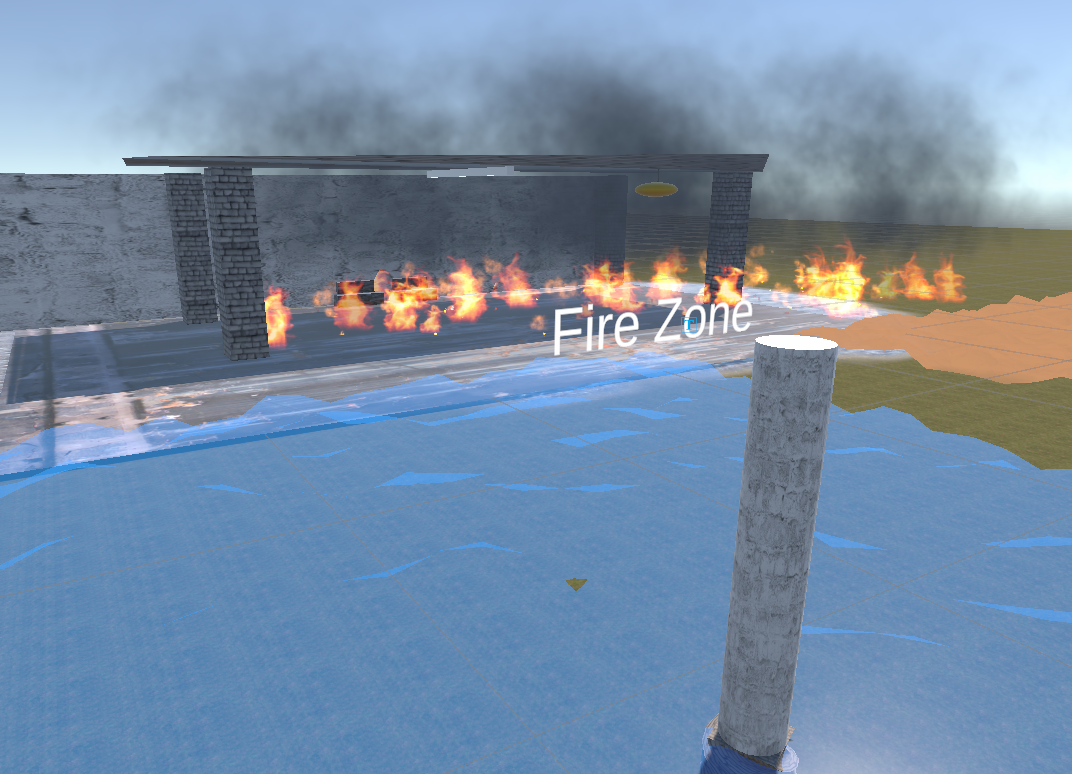
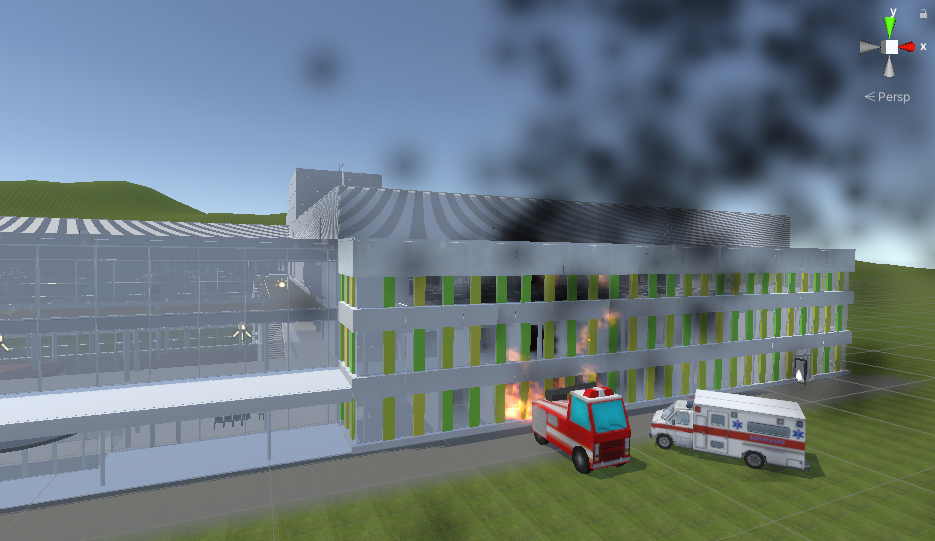
Create a new project in order to update the fires visual effects (VFX) and the smokes particle systems. The more realistc they are, the more engaging the emergency drills will be. In order to achieve this results, I used the Universal Render Pipeline implemented (URP) by Unity.
Chapter 2
Step 2
Inject the previous VFX and particle systems created inside the Mid Coast Hospital project, as well as made a few general changes, like the merge of repeated code and the set-up of game objects in the Unity Editor. In addition, some MidCoast hospital design details had been updated to enhance the simulation realism.

Step 3
Implement NPC (non playable character) clever movement in the surrounding environment.
- avoid walls collision
- declare some not-walkable areas (stairs, rooftop border, clinical rooms, entrance walls)
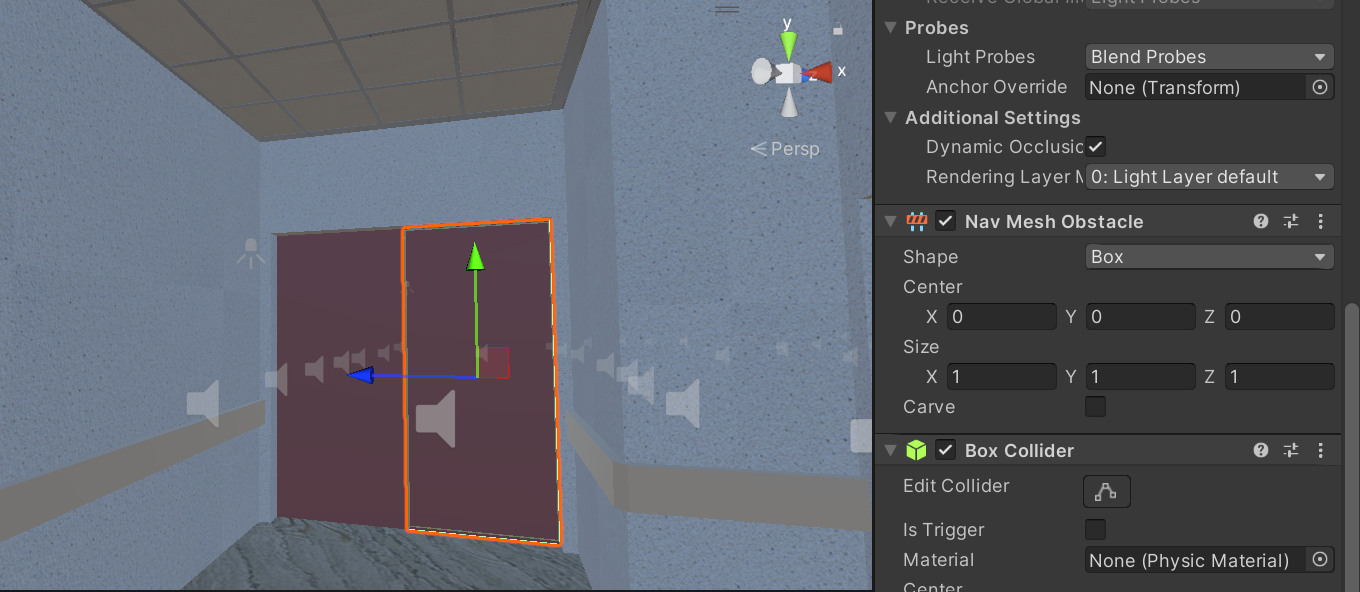
- add a property to all doors (nav mesh obstacle) to stop collisons with them
- on emergency signal:
- change NPC’s animation
- follow an emergency exit
- avoid the damage sources (fires, smokes)

Step 4
Add a startmenu to select an hazard option in order to assign specific ending behaviour to NPC testers.

Note: the final menu is the result of several attempt that aim to supply the best experience for the users.
Step 5
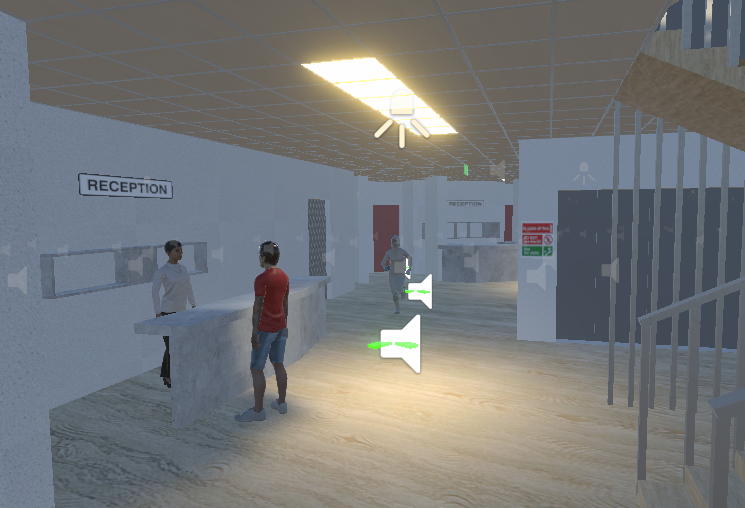
Short demo where the player enter the hospital while NPCs are moving around the environment. Then, at a certain point, the emergency simulation clicks, therefore the player and the NPCs start to look for a safe area.
Chapter 3
Step 6
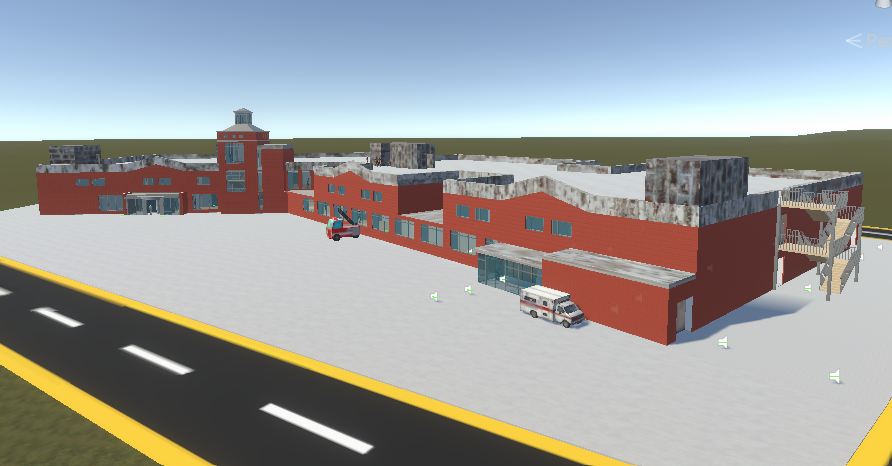
Start working on the definitive hospital. First of all, I tidied up all the Asset folders and I tried to have a good understanding of the hospital structure on the Unity Editor.
Step 7
Redo all the navMesh surfaces (Floor,Walls,Rooftop,etc.) to handle NPCs movements.

Step 8
Ajust and optimaze certain hazard features, like:
- fire and smoke spreading among time and space
- damage inflicted on the player entering the source of damage
- change smoke particle system color after collision
- scratch the doors around the fires areas
- add audio sources on fires

Step 9
Redo and adapt the menu to the new features, like multi-player selection. I choose a circular menu with icons inside the buttons to make it easy to use. The game starts directly inside the hospital with the default options selected, and thanks to the main menu is possible to change them by pressing the pause icon on screen. The options included are:
- Resume the game
- Stop the game
- Reload the game
- Activate or Descativate NPC in the hospital
- Choose which character you want to be
- Select the type of hazard you will encounter.


Note: it is necessary to import the Oculus Integration to use the button on the Oculus controllers  Download it on Oculus Integration on Unity Asset Store, fix the suggestions given by the Unity Editor, and add the code “OVRManager” inside an empty GameObject.
Step 10
Occlusion culling feature implementation inside the simulation.
Occlusion culling is a process which prevents Unity from performing rendering calculations for GameObjects that are completely hidden from view (occluded) by other GameObjects.
Every frame, Cameras perform culling operations that examine the Renderers in the Scene and exclude (cull) those that do not need to be drawn. By default, Cameras perform frustum culling, which excludes all Renderers that do not fall within the Camera’s view frustum. However, frustum culling does not check whether a Renderer is occluded by other GameObjects, and so Unity can still waste CPU and GPU time on rendering operations for Renderers that are not visible in the final frame. Occlusion culling stops Unity from performing these wasted operations.
Chapter 4
Step 11
Creating a Multi-Player simulation inside the hospital. The purpose is that each player could move indipendently in synchro with the others. Unity has an high-level built-in networking library called Netcode. It is meant to abstract the networking logic for you.
First of all, to use it in your project, it is necessary to import the library: open the package manager in the Unity Editor and click on the plus icon in the upper left corner of the window and then, on “Add package by name…”. Now, write the “com.unity.netcode.gameobjects” link in the “name” label section and click “Add”. You can follow this Youtube Tutorial to be sure you are doing it right. After you have impoted the library, you can use it by creating an empty GameObject and inserting a Network Manager script inside it. The default parameters are okay for now, just put the Unity Transport as Network Transport variable.
Additionaly, if you would like to spawn a player a move around the environment of your simulation, you need to create a prefab player and add it to the Player Prefab variable, inside the Network Manager GameObject. Remember to consequently attach a “Network Object” scrpit in order to synchronize the players.
Furthemore, you can include the following code
1
2
3
4
5
6
7
8
9
10
11
12
13
14
15
16
17
18
19
using Unity.Netcode;
using UnityEngine;

public class StartNetwork : MonoBehaviour
{
    public void StartHost()
    {
        NetworkManager.Singleton.StartHost();
    }
    public void StartServer()
    {
        NetworkManager.Singleton.StartServer();
    }

    public void StartClient()
    {
        NetworkManager.Singleton.StartClient();
    }
}
and directly start the simulation as host, server or client. You simply need to add a canvas with three buttons referred to the three functions inside the script “StartNetwork”.
Note: it is possible to test your multiplayer game by adding an external library from github ParrelSync library.
Last Chapter
For privacy reasons, the final doc and the project itself cannot be shared.